
How to Install Underfloor Heating
Underfloor heating is on the wishlist of many self builders (and renovators) as they strive for the optimum in home comfort, energy efficiency and, in some cases, contemporary, minimalist design.

If you’re opting for underfloor heating in your home then it might be a job that you can tackle yourself.
Read our ultimate guide to underfloor heating then follow this step-by-step guide to installing a wet underfloor heating system.
Step One
The first step is to connect the floor heating pipe to the manifold.
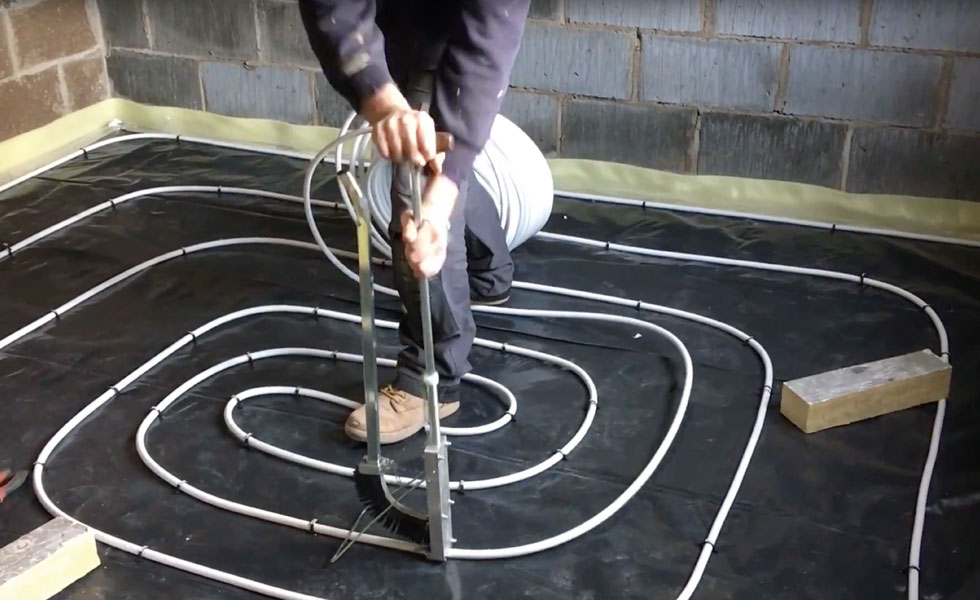
Step Two
After laying your insulation layer, you will need to begin to lay the pipe.
Step Three
Secure the pipe to the insulation as you go using pipe staples.
Step Four
Ensure you fix the pipe with the correct spacing to ensure optimal heat distribution.
Step Five
Loop the pipe across the whole floor area. Use multiple loops for large spaces.
Step Six
Prepare the screed (or opt for a ready-mixed version).
Before you pour the screed…
The pipes must always be pressure tested before the screed is laid. Equally important is to ensure the pipes are full of water while the screed is being laid so that if there is any damage it will be immediately obvious and can fixed before the screed laying is finished.
Step Seven
Carefully pour the self-levelling screed over secured pipework.
Step Eight
Stabilise the screed with a chemical spray.
Step Nine
Finally tamp the screed for a smooth finish.