
How I Style A Bookshelf (Captured On Video In Fast Motion)

Ok, so this post was born from a random comment on Instagram a while back where someone asked if I had ever shared a video of myself styling a bookshelf on video so they could see my process and watch me shift things around… and I was like “would it be interesting/helpful if I recorded myself doing that and shared it?” And then so many people commented under that to basically say YES DO THAT. So I did. And here it is.

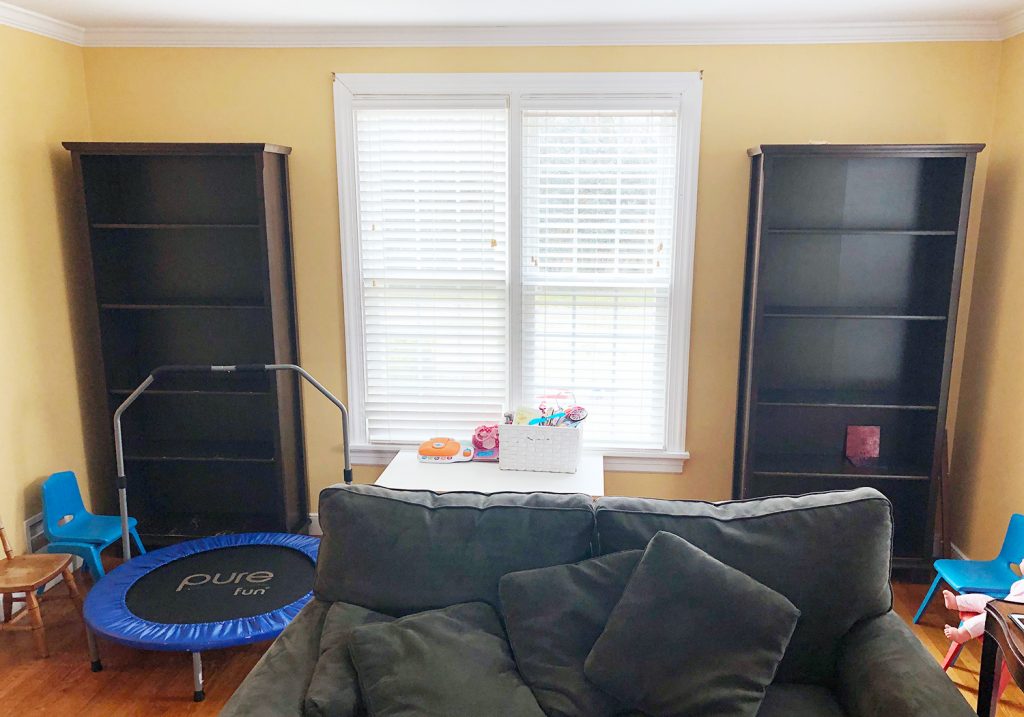
My friend Teresa recently added built-ins to her living room and asked if I’d mind coming over to style them. She knows my soul, and is well aware that’s basically my love language (tied with cheese and shrimp). And thanks to that IG request a while back, we brought the camera & tripod to capture it all. Speaking of her new built-ins, this is what the room looked like before with the Ikea bookcases they had from their last house.
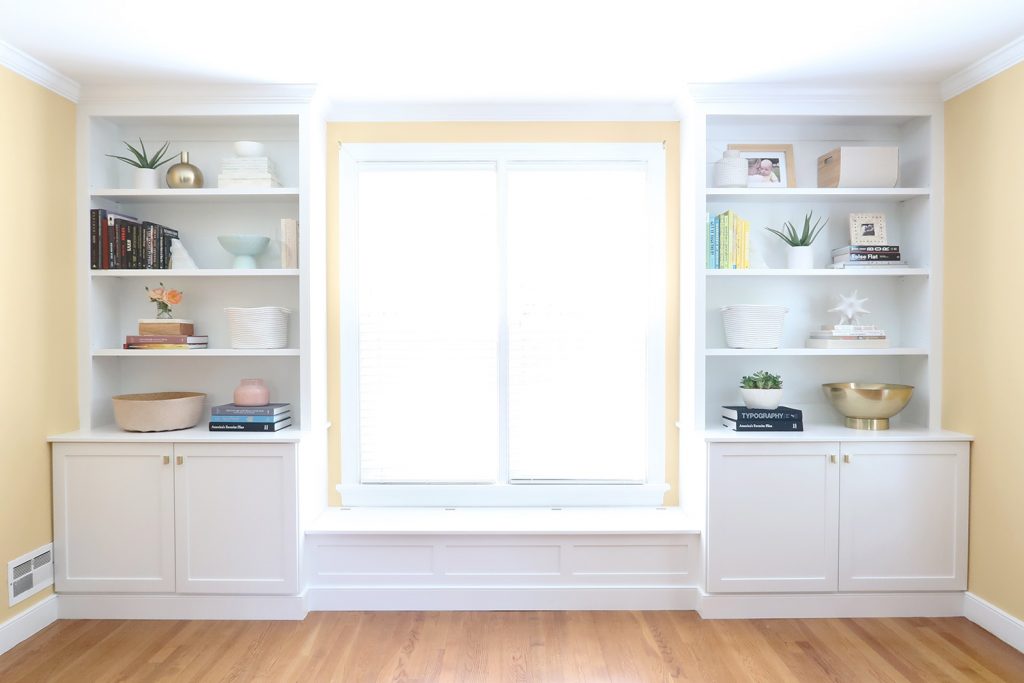
And this is what they built with the help of her dad. These things are amazing! The bench seat under the window even folds up to reveal an extra compartment for stashing stuff, along with those two big base cabinets for concealed storage on each side.
Let the record state that there’s nothing wrong with Ikea bookcases, and they can look fantastic. We’ve had inexpensive freestanding Ikea bookshelves in our office for the last five years and love them. In Teresa’s case, she and her husband Andrew said they fit better in her old house – but ever since they moved six years ago they dreamed of someday adding built-ins along that wall. And it finally happened thanks to her extremely handy dad (John was literally wolf-whistling at the finished product). And then I got to swoop in and style them.
Much like nearly anything else you do, there’s a definite learning curve to tackling a bookcase. And I have a few specific (and very easy/free) things you can try that’ll help A TON. So you can hopefully skip over some of the mistakes I made for years and get to a finished result you love.
Oh and whenever we talk about bookcases there’s the inevitable question about what the ratio of books to other objects should be. It most likely will just depend on how many books you own and want to display in that area. That’s how we landed on the number of books on the built-ins in this video. Since they have other spots with books in their house, and that huge lower bench seat serves as additional book storage for the ones they didn’t want out, I just styled the shelves with the ones they wanted up there. It was that simple. Just do whatever you like – it’s your house.
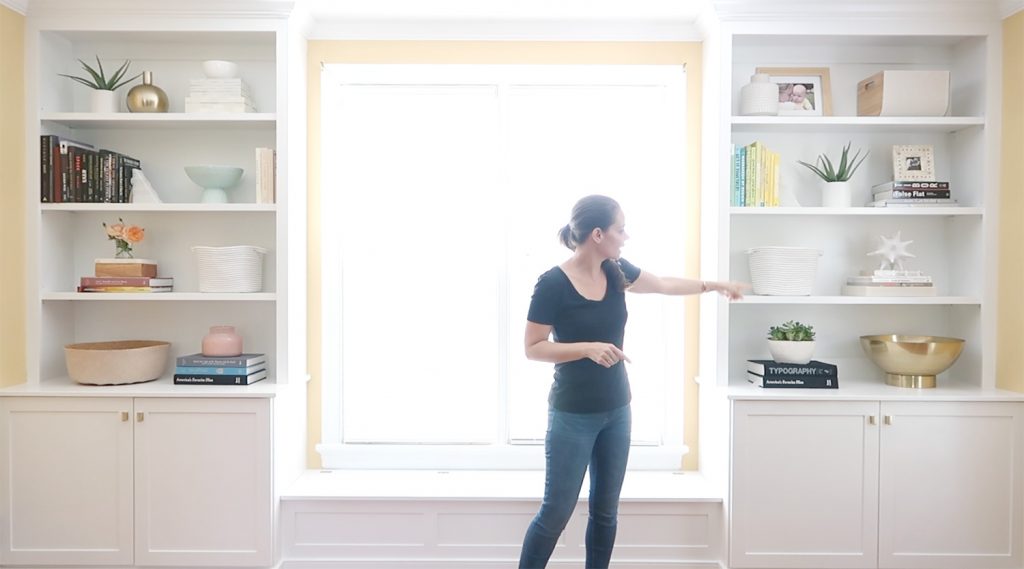
Ok, but on to the video, which I truly think demonstrates so much more than words and even photos can:
Note: If you are viewing this post in a feed reader, you may need to click through to see the video player. You can also watch it here on YouTube.
We looked back at the timestamps, and the entire video took about 22 minutes to film, but I had spent around 10 minutes arranging things into stacks and groupings before we started filming (more on that in a second). So the full process took me about 32 minutes, but it could definitely take you longer if it’s your first or second try at loading up a bookcase. But the key thing to note is that I just kept trying things. Did you see how many items I put down and then moved around?! BASICALLY EVERYTHING. There is so much trial and error, so just try to stay flexible and switch things around until you step back & love what you see.
You’ll have to watch the video to see me demonstrating each tip that comes up on the screen (so definitely come back & watch that if you can’t now). But in addition to those tips – here are three more extra things I thought of after I recorded the video.
Initial Prep Makes Things A Lot Easier
Before ANYTHING goes on the bookcase(s), take out everything you want to put on them so you can see it all together on the floor en masse (like books, large vases, storage boxes and/or baskets, potted plants, picture frames, etc) and combine things to make LARGER GROUPINGS. For the books, put them into larger horizontal and vertical groupings. You can group them by color or subject or whatever you’d like (I often remember the color of a book better than the exact title or author, so I find them more easily when I group ’em by color – but do whatever works for you).
You might also have decorative boxes that you can stack to create a larger grouping. Or smaller objects that you can add to the tops of a few stacks of books that you’ve already made to add height and finish them off. You also might have similar objects that you can display together to make one larger grouping that reads as less busy (for example, a collection of 3 blue glass vases that you can group on top of a large horizontal stack of books).
This initial grouping step with everything laid out on the floor makes the entire process FAR EASIER. In the adjoining room to the bookshelves in this video, I did this exact thing on the floor. So that’s why I just breeze into frame with a stack of boxes all ready to plop down, or a whole grouping of books that are horizontally stacked together. Obviously large objects like vases and baskets, and smaller objects that you’ll pepper in later won’t necessarily have a grouping yet, but pairing up books and boxes and a few smaller things you’ll be displaying en masse is a huge help. Which brings us to my next extra tip…
Fewer Larger Items & Groupings Beat Lots Of Smaller Ones
This tip is born from a mistake I pretty much made constantly for years until it finally dawned on me… LARGER ITEMS AND GROUPINGS ALWAYS LOOK BETTER. Smaller vases sitting alone? Little picture frames not added to a stack of horizontal books or layered in front of a larger one? They look busy. They look piddly. They look lonely with so much space around them. The shelves just don’t look as grounded and balanced and complete when there are tons of little items everywhere.
Literally look at every gorgeous built-in you’ve ever seen and they’ll either have: 1) larger items everywhere (like zero small vases or little picture frames or tiny stacks of books anywhere) or 2) smaller items grouped with other things to appear larger and more unified so they don’t read as a bunch of tiny busy items (like stacked boxes that read as a grouping, small vases or frames placed on top of a horizontal stack of books that read as one unit, etc).
If you’re wondering why your bookcase looks off or busy or just don’t have the presence you’d like, my very first suggestion would be to remove or group smaller things to unify them and make them read as one larger “unit” to the eye when you step back – and to consider adding a few large scale items like a giant vase, a large basket for storage, or some larger book stacks. Sidenote: this also works for mantels, tabletops, open shelving, etc.
Also, This Can Be Gloriously Free!
Don’t forget to check wherever you have extra storage, (the attic, the garage, or even your kitchen cabinets) for large vases, plant pots, frames, and boxes. I often have to style shelves when I stage homes (more on that here and here) and I’m always scouring the house for anything I can use! I’ve totally stacked white shoeboxes and brought in pretty decorative bowls from the kitchen! In the words of Jay-Z, “I’m a hustler, baby. I just want you to know.”
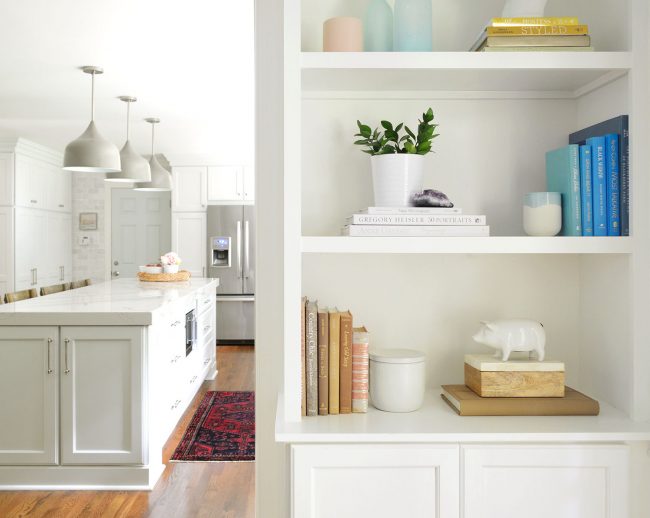
Sometimes just 30 minutes spent using what you have around the house & trying a new arrangement or grouping can make you SO HAPPY. I did it a little while ago with our own living room built-ins and it still feels like a breath of fresh air whenever I walk in there. Talk about a free pick me up!
Can you tell that bookcases excite me? Anyway, I hope the video helped and that you have fun tweaking any shelves or bookcases you have at home. And if you want some other posts that have photos of built-ins or bookcases (or tips for making them), here’s one about building & filling our own living room built-ins, here’s another one where I share how I approach bookshelves when I’m staging a house, and here’s a podcast we did full of tips for anyone who wants a bookshelf full of books (without a lot of accessories in the mix).
P.S. Have you signed up for our free newsletter? It’s like a bonus post that comes to your inbox once a week and we promise never to spam you – you’ll just get tips and photos you can’t see anywhere else.